articles/Photoshop/MEDIAN-Muggle-Vapourisation-page2
Photoshop 4 Beginners - MEDIAN Muggle Vapourisation - part 2 of 1 2
by Mike McNamee Published 01/02/2014

We now employ a median rendering of the images to leave us with a clean people-free shot. Here is the recipe:
Within Photoshop click File>Scripts>Load Files into Stack
Browse to your image set (we had six but you can have as many as 20 or even 50 if you are prepared to wait for the longer processing time.
Check the tick box called 'Create Smart Object after loading layers', then click OK.
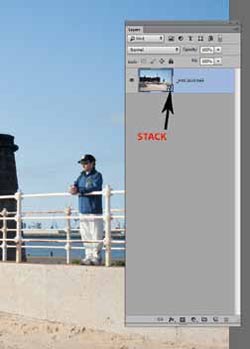
Your interface now looks like this:
Click Layer>Smart Objects>Stack Mode>Median and you are done - magic, no more people!

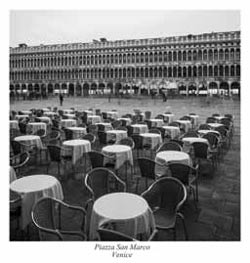
Another of Paul McMullin's 30-second shots from Venice. On this occasion the tourists have remained too still and leave blurred ghosts. This can be done for effect but you have to make it look like you meant it rather than it being a mistake. With a competition image you are always vulnerable to a judge's interpretation if you present such an image.
ian how does it work?
Median is statistical term. Most are familiar with the 'average' of a set of numbers which is obtained by adding up all the individual number values then diving the result by the number of values. The median is similar but it is 'the most frequently occurring value'. Thus if you have a pixel with blue values of 200, 220, 200, 200, 200, and 50 then the median is 200 -the most frequent value. In our image example the blue sky might have repeat values of 200 pixels until a face intrudes but this is ignored and the final processed image contains a pixel with a value of 200 blue. Thus with the median filter working, the system looks for the repeating sky values in the majority of the image and rejects the value, created by say a face, completely.
Please Note:
There is more than one page for this Article.
You are currently on page 2
- Photoshop 4 Beginners - MEDIAN Muggle Vapourisation page 1
- Photoshop 4 Beginners - MEDIAN Muggle Vapourisation page 2
1st Published 01/02/2014
last update 09/12/2022 14:56:37
More Photoshop Articles
There are 0 days to get ready for The Society of Photographers Convention and Trade Show at The Novotel London West, Hammersmith ...
which starts on Wednesday 15th January 2025


