articles/Photoshop/cuttingphotoshopsavianoitaly-page2
Cutting it in Photoshop - Restoration for Chiesa Della Liberia Saviano Italy - part 2 of 1 2 3
by Jane Conner-ziser Published 01/04/2012

Next the details were addressed. I had researched the original artist, Cipro, from 1870 hoping to learn something about him and see other paintings that he had done so I could reference them for colours and style but found little. I did learn from the style of the painting that he created it in the style of artists from a century earlier, in what he might have considered 'Traditional Old Masters' style.
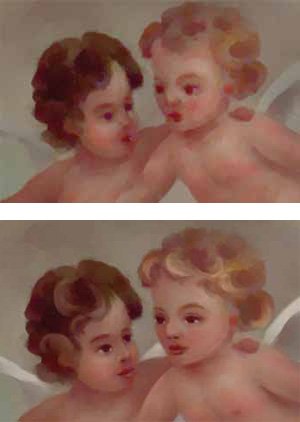
I started with a simple overall blend with the Blender/Grainy Water, set at 100% opacity to preserve as much contrast between strokes as possible. My goal was to remove the grain while following the strokes of the original artist. It was an odd experience for me, over a century after Cipro, and using a computer, to be replicating the style and strokes of he who was also replicating style and strokes...

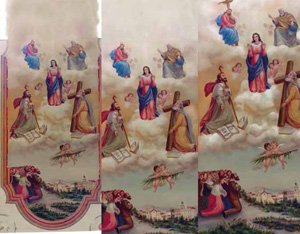
Gabriele Piero, the church representative, also asked if I could extend the corners to make a rectangle, partly to make framing the restoration easier and more cost effective for the church and also in the hopes of making small prints available to the members of the congregation. I freehand painted the extensions of the foreground and people in the crowd, using a combination of brushes and blenders. I airbrushed additional colours to the sky and background that are typical of the time in history, plus added reds and yellows to the skin tones to make them more robust.
The preliminaries completed, the painting was taking shape but looking flat. Blenders are great for removing grain and small image damage, but the trade-off is that they bring all value to a mid-tone range. It was time to bring it to life. I duplicated the painting twice, changed the blending mode of one copy to Screen and the other to Mulitiply, applied layer masks and used an airbrush to add contrast and shape to the clouds, clothing and faces. In addition I continued to build shape, colour and detail using the airbrush.
Please Note:
There is more than one page for this Article.
You are currently on page 2
- Cutting it in Photoshop - Restoration for Chiesa Della Liberia Saviano Italy page 1
- Cutting it in Photoshop - Restoration for Chiesa Della Liberia Saviano Italy page 2
- Cutting it in Photoshop - Restoration for Chiesa Della Liberia Saviano Italy page 3
1st Published 01/04/2012
last update 09/12/2022 14:53:01
More Photoshop Articles
There are 0 days to get ready for The Society of Photographers Convention and Trade Show at The Novotel London West, Hammersmith ...
which starts on Wednesday 15th January 2025


