articles/Portraiture/gatsbyatmidnight-page3
Gatsby at Midnight - part 3 of 1 2 3
by Alisatair Campbell Published 01/07/2016

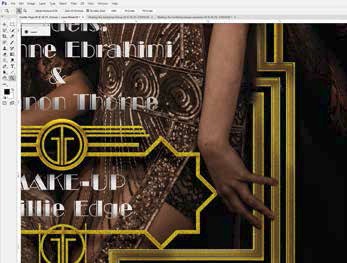
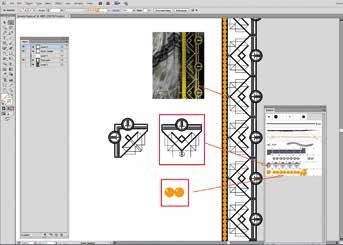
Additional frame elements are then added and planning is required to keep like-elements together on the same Illustrator layer so that they can easily be selected. Once selected they can be pasted as Vector Smart Objects into Photoshop layers again maintaining layer stack order so that shadows can be place for added depth to the final structure. Once the layers are in place each may be coloured, bevelled, embossed and drop shadowed by use of a Layer Effect. When the structure is in place and the intended photographic back drop image has been placed a mask is created for just the metal work and variable light/shadow areas are created for more depth followed by metalisation via another masked layer to which linear motion blurred noise has been added for a brushed aluminium look (aluminium was quite new in the 1920s).

In the case of the 'Credits' page the vector layers were grouped and a layer mask was used to 'cut back' Shannon's arm to bring it out around the screen. This adds depth and harmony by linking the frame and subject. Any variables such as names are added as brushed silver-aluminium with metalisation and layer effects.
And Finally
If all this seems complex it's because it is. Do not expect to recreate such an effect as your first Illustrator/Photoshop project for although it is relatively straightforward you can easily get lost in the myriad of layers and layer effects. However the result is very satisfying, we hope you like it
Please Note:
There is more than one page for this Article.
You are currently on page 3 Contact Alisatair Campbell
1st Published 01/07/2016
last update 09/12/2022 14:54:37
More Portraiture Articles
There are 0 days to get ready for The Society of Photographers Convention and Trade Show at The Novotel London West, Hammersmith ...
which starts on Wednesday 15th January 2025


