articles/Lighting/inverse-square-page1
Inverse Square Dave Montizambert's Creating With Light - part 1 of 1 2
by Dave Montizambert Published 01/06/2014

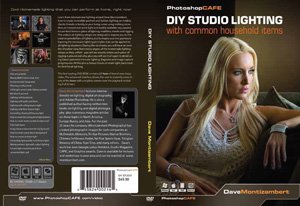
The last 12 months have been really busy for me, I put out three lighting DVDs in that time, the latest is DIY Studio Lighting - With Common Household Items which is all about creating beautiful professional quality lighting on people without the gear, in fact the only photographic gear required is a camera and a tripod, everything else already exists in your home or for under $20 at your local hardware shop. This video relies heavily on the fundamentals of lighting, and it is understanding these fundamentals that made it possible for me to figure out how to make this homemade photography concept work. I believe that when you truly understand how to identify, create, and control light quality and light quantity you don't have to own all the gear, you can 'McGyver' broom handles, ladders, bedsheets, towels, work lights, aluminium foil, and such in its place. However, I not suggesting that you avoid manufactured lighting gear, the real gear works better, much much better, and is way way faster because it is much more efficient, but this homemade approach is a fun learning exercise, and it is great for someone who is just starting out with an empty wallet. Also it could prove invaluable for the pro who shows up to do a shoot in another city to find that their gear didn't make it and no time to source replacements (speaking from experience more than once on this account). I don't teach this approach much because it enrages manufacturers, but in reality it sells the their products - once you get the lighting bug and are doing it with household junk, you soon want to pony up and buy the real gear, way less frustrating, besides showing up on a shoot with broom handles, ladders, bedsheets, etc doesn't really cut it with art directors and/or clients. What I'm really getting at here is that great lighting isn't really about the gear, it is about knowledge, and that lighting knowledge is slipping away - more and more photographers are getting their training from the internet and unfortunately so much of this training is really substandard - they glean their photographic knowledge in bits and drabs never getting the full picture, it's all tidbits in isolation, the sum rarely equaling the whole.
Because of this, new photographers are not receiving a good education, the basics are not being taught and are being forgotten. Check out my 'DIY DVD' at www.montizambert.com and if you are interested it is available from my website at a reduced price from the list price and it is also available at www.photoshopcafe.com . You can also get the Disciple of David Discount by entering 'monti01' in the promo-code box on the Photoshopcafe site, but the better deal is from www.montizambert.com.
I'm just back from two months of lecturing and travel and one of things that really struck me is that more than ever many photographers don't really understand lighting fundamentals such as the inverse square law, or if they do, not with any depth. So in this article I'm going to take a look at the inverse square law and hopefully try to explain it in a way that a creative mind can grasp.
You are probably thinking that the inverse square law is just a bit of theoretical mathematical abstract rubbish that we don't really need to know, that it is something that we read about or learned about in lighting basics but never really use because we have light meters. It is most commonly thought of as a way for nerdish photographers or selfimportant instructors to show off how they can calculate in their heads the change in brightness on a subject when the distance of the light source is altered. But it does more than this, it isn't just for exposure and showing off, an understanding of the inverse square law allows you to:
• More easily conceive a lighting solution and solve the problems it will invariably cause.
• Make adjustments to a light source's power settings and distance with little to no trial and error thus speeding up the lighting process.
• Better understand how to create and control light quality (the Inverse Square Law plays a really important part in this last point - more on this in a future article).
Inverse square law is really a formula for calculating energy to area. The Inverse Square law tells us to take the inverse square of the distance, which is easy enough to understand, if you know something of math, but if you're a photographer you probably don't - most of us are still recovering from learning how f-stops work. The inverse square law is a little confusing because the formula is stated backwards.
This formula has three parts and in a nutshell works like this: 1) calculate the change in distance of the light-source, 2) square this figure, 3) invert the result. So in the first part, what do I mean by take the change in distance? Ask yourself, 'Is the light moving closer to or is it moving further way from the subject'. If it is moving closer then it is a fraction, if it is moving further away then it is a multiple. For instance, if you move the light from 4 metres to 1 metre that would be quartering the distance so the number to do your math with would be 1/4. If you move the light from 1 metre to 2 metres from the subject, that would be multiplying the distance so the number to do your math with would be the number 2. The second part of the formula requires you to square the change in distance, which simply means, take the change in distance and multiply it by itself - eg 1⁄4 x 1⁄4 = 1⁄16th and 2 x 2 = 4 times. The result of this calculation tells you the area that the light energy will now cover, so quartering the distance of the light from the subject forces the light to cover 1⁄16th of the area (which is 1⁄4 of its vertical dimension and 1⁄4 of its horizontal dimension); doubling the distance of the light from the subject will make the light cover a 4 times bigger area (which is twice its vertical dimension and twice its horizontal dimension). To arrive at the change in brightness we need to use the third part of the formula, we need to invert this figure from part 2. In the examples above: 1⁄16th inverted is 16/1 or simply16 times brighter, and 4 times would become 1⁄4, 1⁄4 of the original brightness.
You are currently on page 1
- Inverse Square Dave Montizambert's Creating With Light page 1
- Inverse Square Dave Montizambert's Creating With Light page 2
1st Published 01/06/2014
last update 09/12/2022 14:55:16
More Lighting Articles
There are 0 days to get ready for The Society of Photographers Convention and Trade Show at The Novotel London West, Hammersmith ...
which starts on Wednesday 15th January 2025


