articles/Software/p4blightroomfilter-page4
P4B - Lightroom 3Lightroom Graduated Filter - How to! - part 4 of 1 2 3 4
by Art Suwansang Published 01/09/2010

Scenario 4: Colour Correction with the Graduated Filter
The idea of adding a localised colour cast to an image was introduced in the previous enhancement. This approach can now be altered to perform a localised colour correction on an image, with a basic understanding of the colour wheel and creative thinking. Part of the building on the left (figure 11a) has a cooler, blue-violet colour cast on it, which does not match the natural colour of the surrounding buildings. I would start by referencing the colour wheel (figure 12) for this image and find the colour that is opposite to the colour cast. If I draw a straight line from blue/purple through the centre of the wheel, I would end up with a warmer colour tone between yellow and red. This is the range of colour that I have selected in the colour effect palette. To apply the graduated filter to this image simply click and drag the filter from the left side of the image to cover the front of the building with the colour.
Scenario 5: Selective Plane of Focus (Lens Baby Effect)
You can create a selective focus look that resembles images shot using a Lens Baby. This effect is best applied using Lightroom 3, as there were changes made to the sharpness effect slider and it behaves differently to Lightroom 2. Instead of having a rigid lens barrel, like most lenses, the Lens Baby's barrel is a plastic accordion that can stretch and/or compress freely thereby creating a unique plane of focus, unlike that of a traditional lens. If you photographed with this type of lens, the selective focus effect is permanent. However, if this effect gets applied in Lightroom, then you would have full control and freedom to change the behaviour of the focus plane on any image.
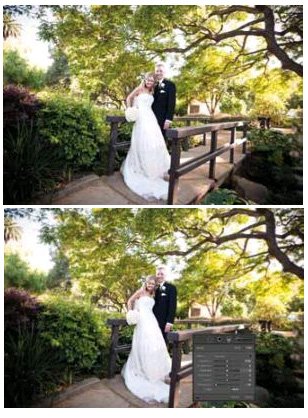
The sharpness effect slider is the key to create this creative look in postproduction. Simply decrease the sharpness to any value between -50 and -100. The numeric value that you set will vary depending on your personal preference and the base image. I prefer an intense out of focus effect, so I generally set my sharpness between -90 and -100. Additional enhancements may be included with this de-focus effect as well, using the other adjustment sliders. Once done, simply apply the graduated filter on the image; keep in mind that is best to have the pin and centre white line a touch away from the subjects. Examples of before and after can be seen in figure 13.
The techniques used with these graduated filter effects is based on applying the adjustments logically to the effect sliders, starting at the top and moving your way down to achieve the desire result. Each of these scenario settings can also be apply to the adjustment brush tool as well. Once you know how the graduated filter works, you can create stunning masterpieces quickly, right from within Lightroom!
Please Note:
There is more than one page for this Article.
You are currently on page 4
- P4B - Lightroom 3Lightroom Graduated Filter - How to! page 1
- P4B - Lightroom 3Lightroom Graduated Filter - How to! page 2
- P4B - Lightroom 3Lightroom Graduated Filter - How to! page 3
- P4B - Lightroom 3Lightroom Graduated Filter - How to! page 4
1st Published 01/09/2010
last update 09/12/2022 14:57:16
More Software Articles
There are 0 days to get ready for The Society of Photographers Convention and Trade Show at The Novotel London West, Hammersmith ...
which starts on Wednesday 15th January 2025


