articles/Photoshop/quickies-page1
David Simm - Quickies - part 1 of 1 2 3
by David Simm Published 01/10/2004

Quick Fixes 101... Simmply Speaking
PHOTOSHOP IS THE MOST INCREDIBLE PROGRAMME, it reminds me of an ice berg, the amount I have mastered is like the little bit of the 'berg sticking out of the water, while the vast volume of unknown lurks beneath the waves. It is the little intuitive things that I really like and here is a quick fix that is related to an article I wrote a couple of years ago on dealing with recovery from under and over exposure situation. This one has both rolled into the one image.
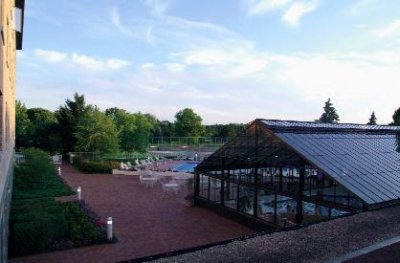
As I was shooting a wedding reception, at an hotel that I been trying to establish a rapport with, suddenly the Catering Director came up to me and asked if I wouldn't mind shooting a quick picture of the patio behind the hotel. OK I thought, during the receiving line I'll sneak out and grab the shot. To save time I did a very un-Simm thing I took two shots at different exposure, one for the patio, the other for the sky, intending to combine them once back at base.

As I was shooting a wedding reception, at an hotel that I been trying to establish a rapport with, suddenly the Catering Director came up to me and asked if I wouldn't mind shooting a quick picture of the patio behind the hotel. OK I thought, during the receiving line I'll sneak out and grab the shot. To save time I did a very un-Simm thing I took two shots at different exposure, one for the patio, the other for the sky, intending to combine them once back at base.
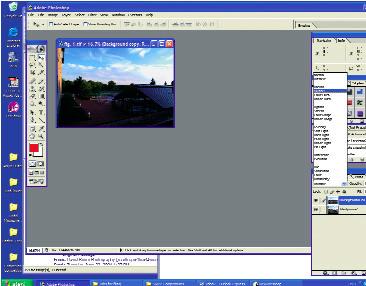
Opened in Photoshop the one image revealed that I had no need to bother with all that cut and paste to combine two images, I just got a better idea. I grabbed the thumbnail in the layers palette and dragged it to the create a new layer icon (next to trash can), I changes the opacity to multiply, see figure 2, then with the eraser I wiped out the ground and buildings from the new layer, effectively just darkening the only sky. I added a second layer of just the sky to darken it further without affecting the foreground. I then linked the layers and with Ctrl-E flattened them.
The sky is now beautifully detailed, but I would like to see more information in the foreground, I created a new layer in exactly the same way, drag the thumbnail clown to the new layer icon, but this time change the opacity to screen and this time I erase the sky from the new layer, just brightening the foreground, again drag the top layer to the new layer icon and immediately see a vast improvement, I linked the layers and with Ctrl-E flatted the image.
By Monday afternoon my prints were in the mail and ready to impress the director of catering, if that doesn't get us on the hotel's wedding referral list, nothing will. Although the middle of a wedding is not really a good time to be asked to do a commercial shoot, a lightening fast demonstration of skill was just what I needed to impress the iceberg of a catering director, now instead of just one or two weddings a year at this venue,we may be able to look forward to a sizeable share of the events they host. Moreover the whole Photoshop operation took only minutes... that's a quick fix!
You are currently on page 1 Contact David Simm
1st Published 01/10/2004
last update 09/12/2022 14:58:25
More Photoshop Articles
There are 0 days to get ready for The Society of Photographers Convention and Trade Show at The Novotel London West, Hammersmith ...
which starts on Wednesday 15th January 2025


