articles/Photoshop/magic-channel-page2
The Magic of Photoshop Channels - Part Two - part 2 of 1 2 3 4
by George Fairbairn Published 01/08/2015

3
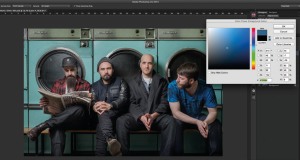
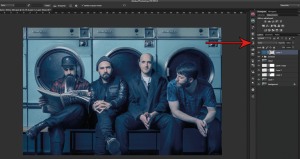
First we are going to add blue to the shadows. Click on your colour boxes on the left and pick a nice shade of blue (image 3). Once you are happy with your colour, click ok. Now we need to fill our layer with this colour. First though, because we will be working on the shadows, we need to invert our mask. Click on your layer mask and hold down Command/ control and I. This will invert our mask and now allow any colour we add into the shadows. Now click on the layer thumbnail and hold down Alt and then delete. This will fill your layer with your new blue colour. Change the blending mode to Color (Image 4) and you will see something that doesn't look too great. Don't worry though, we are now going to make it look awesome. Click back on your layer mask. Now we want to see the layer mask itself to work on it. So hold down Alt and click on the layer mask.

4
You will now see your image change to display the layer mask itself. Let's adjust it, so hold down Command/Control and hit L. This will bring up a levels adjustment, but a levels adjustment that will ONLY affect the layer mask. Adjust your sliders until everything you want to be blue is white, and anything you DON'T want to be blue is black. For images containing people, it's imperative that their skin does NOT become blue (Image 5). Once you are happy, click ok and click back on your layer thumbnail to see the results. It looks a lot better doesn't it? But, it's more than likely far too much, so adjust the opacity down (I usually go with something between 20 and 30%).
Please Note:
There is more than one page for this Article.
You are currently on page 2
- The Magic of Photoshop Channels - Part Two page 1
- The Magic of Photoshop Channels - Part Two page 2
- The Magic of Photoshop Channels - Part Two page 3
- The Magic of Photoshop Channels - Part Two page 4
1st Published 01/08/2015
last update 09/12/2022 14:56:16
More Photoshop Articles
There are 0 days to get ready for The Society of Photographers Convention and Trade Show at The Novotel London West, Hammersmith ...
which starts on Wednesday 15th January 2025


