articles/Photoshop/magic-of-channels-page2
The Magic of Photoshop Channels - Part One - part 2 of 1 2 3 4
by George Fairbairn Published 10/04/2015

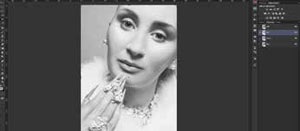
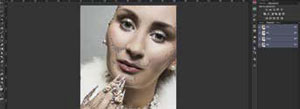
When you first click on the channels tab, you will see that you have the RGB channel (a combination of all channels), a Red channel, a Green channel and a Blue channel. If you were to click on the thumbnail of any of these channels you will see your image changes to show you JUST that channel (fig 3). This is quite useful as each channel gives us a different result. For the purpose of adding, or controlling, the contrast of our image we want to start with the channel that gives us the most contrast from the outset. For this image, the Blue channel gives me the most contrast. Before we do anything, make sure you go back and click on the RGB channel to bring your image back to the 'normal' RBG view. Now, I stated that I want to use the Blue channel for my contrast. To do this I am going to hold down Command (mac) or Control (PC) and click on the thumbnail of the Blue channel. You will see instantly that Photoshop has made a selection for you using the Blue channel as its guide (fig 4).

With our selection active we are going to click back onto our layers tab and then create a Levels Adjustment layer. You can do this by either clicking the levels icon in your adjustments window, or by going to layer -> New Adjustment Layer -> Levels. Once you do this your selection vanishes, but you have a layer mask on your new levels layer that looks exactly like your Blue channel did. We now need to use this mask to add our contrast to the image. Before we do that, let me explain exactly what adding contrast means. In a nutshell, by adding contrast we are going to darken the shadows and brighten the highlights...this is important to remember.
Please Note:
There is more than one page for this Article.
You are currently on page 2
- The Magic of Photoshop Channels - Part One page 1
- The Magic of Photoshop Channels - Part One page 2
- The Magic of Photoshop Channels - Part One page 3
- The Magic of Photoshop Channels - Part One page 4
1st Published 10/04/2015
last update 09/12/2022 14:56:16
More Photoshop Articles
There are 0 days to get ready for The Society of Photographers Convention and Trade Show at The Novotel London West, Hammersmith ...
which starts on Wednesday 15th January 2025


