articles/Cameras/takingadvantageofdslrvideo-page3
Taking advantage of DSLR Video - part 3 of 1 2 3 4
by Stuart Barry Published 01/12/2010

Although focus has to be manual, the camera can still handle various auto exposure (AE) settings. To get started, try all the auto modes. But to get an early taste of what is possible, dial up manual or aperture priority, set to the maximum aperture and be amazed at the results.
In any of the auto modes the camera will handle changing light conditions if you move the camera. With manual mode you use a meter in exactly the same way as you do for stills.
Lighting and composition are equally important in both stills and video. But in video there is the added dimension of movement, pan, tilt and zoom. It is best to start simple - keep a fixed focal length and avoid zooms; use the video a bit like a stills camera to record lots of separate scenes
Editing
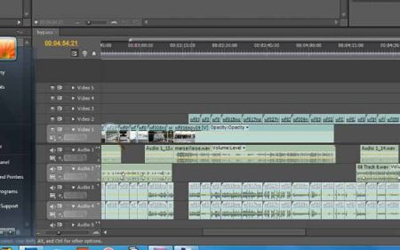
Another advantage of using a DSLR is that you will start off with a tapeless workflow. Just copy all the video files onto your hard drive and you are ready to start editing.
I am not going to enter into the PC vs Mac discussion here. You will already have your own preferences. Suffice it to say that whatever hardware platform you choose, you will need lots of it to edit HD successfully. It's best to read the manufacturer's specification for your chosen application before you commit to an editing suite.
There are several low-cost or free packages that you can use to get you started. All have basic timeline editing facilities. Most will handle widescreen 16:9, but not HD. As you progress you can decide which of the major applications suits your workflow. For photographers familiar with Photoshop, Adobe Premiere Pro might be a natural choice. It comes with Encore, allowing you to produce fancy DVD layouts. Mac users will gravitate towards Final Cut Pro.
Here is a simple way to get started:
- Create bins (folders) for original clips, titles, sound, stills.
- Check each clip and trim start and end.
- Move your clips into a storyboard sequence.
- Leave some scene-setting stills and clips for 'cutaways'.
- Move your clips onto the timeline in sequence.
- Do not add any transition effects. Stick to a straight cut.
- Add a soundtrack and titles.
- Burn to DVD and add menus. Or create a Flash video.
Please Note:
There is more than one page for this Article.
You are currently on page 3
- Taking advantage of DSLR Video page 1
- Taking advantage of DSLR Video page 2
- Taking advantage of DSLR Video page 3
- Taking advantage of DSLR Video page 4
1st Published 01/12/2010
last update 09/12/2022 14:59:31
More Cameras Articles
There are 0 days to get ready for The Society of Photographers Convention and Trade Show at The Novotel London West, Hammersmith ...
which starts on Wednesday 15th January 2025


