articles/Presentation/windowmount-page1
Making a Window Mount - part 1 of 1 2 3
by Mike McNamee Published 01/02/2012

Rule Number 1
The old carpenter's adage 'measure twice, cut once' applies to the process. To this we might add, take more care as the project progresses.
For example, if you duff up cutting the print then you can just make another one. Allow a piece of double-sided tape to stick to the front of the finished, mounted print and you are wasting:
1. An hour of your time
2. The cost of the window mount (£5)
3. The cost of the backing board (£3)
4. The cost of the double-sided adhesive sheet (£1.75)
5. The cost of the gold leafing (£5 plus time)
6. Cost of the paper (£4.85)
7. Cost of ink (£2)
8. The vet's bill for the cat
9. The cost of the divorce (the cat belongs to the wife)
Experience teaches that mismeasuring remains the most frequent error, followed by misaligning the print, cockling the print and finally getting blood from the cat splattered onto the mount.
Here's the way to reduce some of the pain. In this example we are mounting just two prints, for display at the Convention. As part of the PoY Judges' display, no compromises were allowable, the prints needed to be impeccable! Frequent users of mounted prints will have the business sorted and can skip to the next feature; likewise rich users, who will probably have the whole thing carried out by the lab or their framer anyway!
The Mount Size
In this instance we were asked to provide two prints 20 x 24 inch in size.
Allowing two inches around the top and sides and an extra inch for the base implies a 20 x 15 inch aperture for the window giving perhaps a 19" x 14" printed area.
Immediately a problem looms, 19 x 14 is a goofy ratio that does not correspond to any of the uncropped DSLR sizes. As no compromises were being entertained anyway we wished to keep the crop to 'best for image/ composition' rather than best for a regular mount size. So, the cropping was arranged first and the window mount was juggled to suit on a oneoff, bespoke basis. After all we have said about measuring, the framer made the first one the wrong size! When cropping is vital, a quarter inch here and there can make all the difference.
For run-of-the-mill studio work, then, you are better off deciding on a convenient size and preparing the image to that size. In our case we also had to print onto A2 and trim down the sheet to suit the bespoke crop, with window mounts you should not leave too much of the window overlapping (and hence not glued) to the print and so it is necessary to trim the margins of a print such that no more than 1⁄2-inch is not stuck.
The Gear
This is carried out using a Hot Press, JetMounter. This is a 24", automatic, foot-operated machine. Hot Press are probably the only game in town and make a range of manual and electric mounters and laminators for every conceivable application (see www.hotpress.co.uk). Ours gets only occasional use, is stored on a shelf and is very heavy. You need lots of space and a clean, uncluttered working area. All are in short supply around here. There is a huge difference for studios producing lots of mounted prints, here the JetMounter is likely to be mounted on a table so that the out-going, mounted print is level with the receiving area; a larger cutting area will be available and, most likely, spindle mounted rolls of adhesive paper and laminates will be set up.
For our little ventures the dining table is pressed into use, which carries the risk of adding #10 to the list in the previous section entitled, 'pay a cabinet-maker and French polisher'. Hacking a lump out of the dining table also makes #9 more likely to occur!
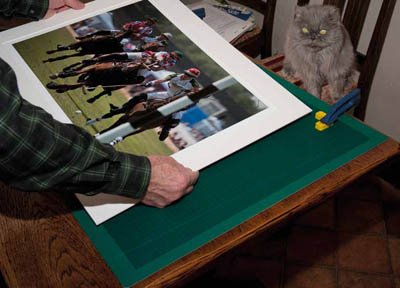
To complete the gear we have a scalpel, steel straight edge, cutting mat, a couple of corners (see later) and two G-clamps.
You are currently on page 1 Contact Mike McNamee
1st Published 01/02/2012
last update 09/12/2022 15:00:24
More Presentation Articles
There are 0 days to get ready for The Society of Photographers Convention and Trade Show at The Novotel London West, Hammersmith ...
which starts on Wednesday 15th January 2025


