articles/Postproduction/depthbluring-page2
Depth of Field Blurring - part 2 of 1 2 3 4
by Mike McNamee Published 01/02/2005

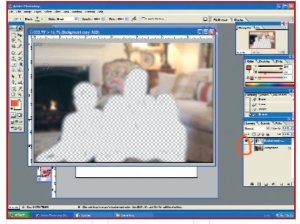
Now select the eraser and its brush size and edge softness. With a bit of trial and error you can find a value so that you can get round the detail that you wish to be sharp. Stay on the top layer (the out of focus one) and start to erase only the subjects; this lets the bottom layer, which hasn't been affected by the Gaussian Blur, show through.
If you click on the eye next to the background layer, you can see the effect of erasing your subjects from background copy, click the eye again and you will see your new selective focus portrait. Now just before printing, flatten the image, colour correct, add Unsharp mask and save as: with a new name or number.

That's it; that is all you have to do to create a great looking portrait with differential focussing the subjects are nice and crisp, while the background is soft and fuzzy, giving the image an almost three dimensional look. Let me just point out, that this image was wanted for Christmas Cards, which we sell at package prices, i.e. although there is a profit, I don't want it eaten up by computer time manipulating the image. I view greeting cards as add-on sales, which we might never sell if they weren't competitive.
When the client orders an image of 20 x 16" or larger, I may take a closer and perhaps revisit the method I described in paragraph one, but for quick fixes on Christmas cards, wedding candids or any other smaller print application, I don't think you can beat this one.
Please Note:
There is more than one page for this Article.
You are currently on page 2
- Depth of Field Blurring page 1
- Depth of Field Blurring page 2
- Depth of Field Blurring page 3
- Depth of Field Blurring page 4
1st Published 01/02/2005
last update 09/12/2022 14:53:13
More Postproduction Articles
There are 0 days to get ready for The Society of Photographers Convention and Trade Show at The Novotel London West, Hammersmith ...
which starts on Wednesday 15th January 2025


