articles/Presentation/fameup-page3
It's a Frame-up! - part 3 of 1 2 3 4 5 6
by Mike McNamee Published 01/02/2009

Variations
There are many ways of accomplishing this task. The important thing to remember is that when you control-click the alpha channel you 'load the channel' as a selection. If the alpha channel is 50% dense, you load at 50% opacity and when you delete, you delete at 50% effect. Therefore by changing the density of the mask you change the depth of colour that remains in the jagged edge of the final composite. You can thus vary the strength of the fade-off in the edges.
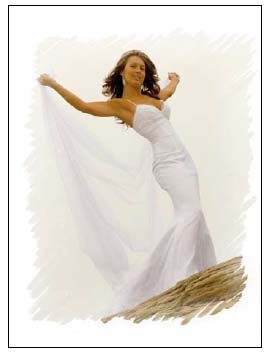
A quite different approach, but one that has more versatility, is to use the alpha channel of the felt pen image to create a layer mask. To do this you create the alpha channel in the normal way and drag it across as before. You then double click the Base Layer of the picture image to convert it, by default, to Layer 0. You then need a new layer beneath Layer 0 which is filled with white (so you can see the effect in a few moments) [see B].
Now you control-click the alpha channel 1 (the felt tip channel) to load a selection, hit Ctrl-shift-I to invert the selection and then create a layer mask. This cuts out the image with a ragged edge but you can refine the layer mask to control the edge effects. In our example we have opened the Levels adjustment of the layer mask and dragged the mid-slider [C] to control the effect near the edge as arrowed, note the stripes of the felt pen are controlling the depth of tone in the model's arm.

PhotoFrame 4
reviewed by Carol Tipping
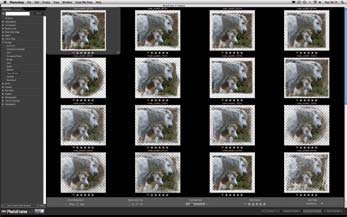
If the previous pages have made your head hurt then read on. We asked Carol Tipping to take a look at the latest version of PhotoFrames on her Mac system. Carol is a highly creative and qualified artist so we were unsure if she would like the 'ready-made' frames. It turns out she is quite a fan and had a great time trying things out.
Please Note:
There is more than one page for this Article.
You are currently on page 3
- It's a Frame-up! page 1
- It's a Frame-up! page 2
- It's a Frame-up! page 3
- It's a Frame-up! page 4
- It's a Frame-up! page 5
- It's a Frame-up! page 6
1st Published 01/02/2009
last update 09/12/2022 14:54:08
More Presentation Articles
There are 0 days to get ready for The Society of Photographers Convention and Trade Show at The Novotel London West, Hammersmith ...
which starts on Wednesday 15th January 2025


