articles/Photoshop/janeconner-zisermarylinsholinvikkipopwell-page6
Jane Conner-ziser Marylin Sholin Vikki Popwell - part 6 of 1 2 3 4 5 6 7
Published 01/11/2005

Overlay Dodge and Burn Layer - method 2
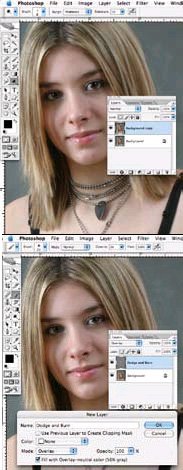
Create a Dodge and Burn layer in the form of a blending mode (Overlay) that works with the Brush Tool and defaulted foreground and background colours (black and white). Good when file size is an issue or you are insecure about committing your artwork to the image - or if you think you might have to go back and redo it in the future.
Advantages:
This method does not increase your file size. You are not actually applying the work until you flatten the file, so you do not have to make a patch to go back or rework an area.
Disadvantages:
The Overlay Blending Mode restricts the application to what the blending mode is capable of - high contrast and saturation - you can't dodge to white or burn to black. You have to create additional layers to correct discolourations. Reworking an area allows you to go past where you started from in value, so it's harder to blend smoothly.
Here's how to make an Overlay Dodge and Burn Layer:
Hold down the Option (Alt) key while you click on the New Layer icon at the bottom of the Layers Window. A Properties Window will open. Name the new layer Dodge and Burn, change the Blending Mode from Normal to Overlay, choose 100% opacity and "fill with overlay neutral colour (50% grey). Set the Brush Tool options to Mode: Normal, Opacity 3-5% and Flow 100%. Use brush sizes just slightly smaller than the areas you want to match up to the surroundings. In the Brush Window, turn off Shape Dynamics to maintain consistent brush size. Dodge using white as the foreground colour. Burn using black as the foreground colour. Keyboard shortcut x toggles between the two colours.
How to correct mistakes:
Use the opposite colour to rework mistakes. To start over again, fill the area with 50% grey.
Jane Conner-ziser unravels the secrets of Photoshop retouching
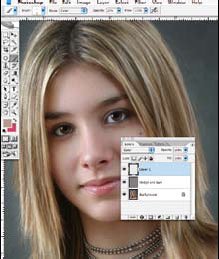
How to correct discolourations: Click on the new layer icon at the bottom of the Layers Window. Make sure it is on top - if it isn't, drag it up. Change the layer blending mode (in the Layers Window) from Normal to Colour. Set Brush Tool options to Mode: Normal, Opacity 20% and Flow 100%. Hold down the Option (Alt) key and click on the colour you want (usually the colour right next to it). Apply a few coats until the colour is corrected.

Screen and Multiply Dodge and Burn Layers - method 3
This method uses lighter and darker versions of the image for dodging and burning. Incredible for selectively controlling contrast and value and is a powerful enhancement tool for photo realistic retouching, quick vignettes, hair, clothing and eye enhancements.
Advantages:
The blending modes are lighter and darker versions of the same file so perfect pixel registration is maintained. Mistakes are easy to correct without overworking the area. It is infinitely editable. Most work is invisible.
Disadvantages:
The file size becomes the largest of the three methods in this article. You have to change layers while you are working. It is limited by the Screen and Multiply characteristics of your file so you can't dodge to white nor burn to black. Discolourations require the creation of an additional layer for correction.
Please Note:
There is more than one page for this Article.
You are currently on page 6
- Jane Conner-ziser Marylin Sholin Vikki Popwell page 1
- Jane Conner-ziser Marylin Sholin Vikki Popwell page 2
- Jane Conner-ziser Marylin Sholin Vikki Popwell page 3
- Jane Conner-ziser Marylin Sholin Vikki Popwell page 4
- Jane Conner-ziser Marylin Sholin Vikki Popwell page 5
- Jane Conner-ziser Marylin Sholin Vikki Popwell page 6
- Jane Conner-ziser Marylin Sholin Vikki Popwell page 7
1st Published 01/11/2005
last update 09/12/2022 14:55:22
More Photoshop Articles
There are 0 days to get ready for The Society of Photographers Convention and Trade Show at The Novotel London West, Hammersmith ...
which starts on Wednesday 15th January 2025


